 English

Views: 0 Author: Site Editor Publish Time: 03-09-2025 Origin: Site


If you need new Rubber Tracks for a mini excavator, compact track loader, skid steer, or farm machine, one thing matters more than anything else: getting the measurements right. Measuring Rubber Tracks is simple when you know what to look for—width, pitch, guide type, and link count—and how to verify those numbers across different machines and wear levels. This guide gives you a quick, featured‑snippet‑style answer, an easy checklist, two data-driven tables, and practical troubleshooting so you can order with confidence and avoid downtime. You’ll also learn how those measurements tie into the undercarriage parts you should inspect or upgrade, including options across Agricultural Machinery Parts and related manufacturing categories you can source in one place.
Measure Rubber Tracks by four points: width (outer-to-outer), pitch (center-to-center of adjacent inner drive lugs), guide type (internal vs external), and total link count. Park on level ground, clean the track, measure in millimeters at several spots, average your results, and match them to the size code (Width × Pitch × Links) before ordering.
Follow these steps and you’ll get accurate readings you can trust, whether you’re measuring Rubber Tracks for a mini excavator, a compact track loader (CTL), a skid steer conversion, or agricultural equipment.
Park level, secure the machine, and clean the track
Shut the machine off on flat ground, chock if needed, release any load in the boom or arms, and brush away compacted dirt. A clean track avoids false readings and lets you see the inner drive lugs clearly.
Measure track width (outer-to-outer)
Use a tape measure and record the width across the outermost edges of the Rubber Tracks. Always measure in millimeters for consistency. If the edges are rounded from wear, measure at two or three points and average.
Measure pitch (center-to-center of inner lugs)
On the inside of the track, pick two adjacent drive lugs (the molded blocks that mesh with the sprocket). Measure from the center of one lug to the center of the next. Repeat at three to five spots around the loop and average your numbers. Wear can change pitch locally, so averaging improves accuracy.
Identify the guide type
Rubber Tracks use either an internal guide (guides ride between the rollers) or an external guide (guides sit outside a roller’s path). Take a clear photo of the inner profile and the sprocket tooth shape if you’re unsure. Matching guide type prevents derailment and uneven wear.
Count the links (also called metal core bars or drive lugs)
Start at a clearly marked point and count each inner lug around the entire loop. Mark every 10th lug with chalk if you’re prone to losing count. This number becomes the “links” value in the size code.
Decode or confirm the size code
Many Rubber Tracks use a code formatted as Width × Pitch × Links (for example, 300 × 52.5 × 86). If your machine or old track shows a different format or imperial units, convert to millimeters and confirm your average pitch and link count match.
Note wear and fit issues
If the sprocket teeth are sharp or the rollers have flat spots, new Rubber Tracks might still ride poorly. Measure now, but plan to inspect undercarriage parts before you install.
That’s all you need to size Rubber Tracks correctly. The rest of this guide helps you validate those measurements across machine types and avoid the most common ordering mistakes.
Use this table as your measurement cheat sheet. It keeps the focus on the four dimensions that actually determine fit and function.
| Dimension | How to Measure | Typical Range (mm) | Common Mistakes | Pro Tip |
|---|---|---|---|---|
| Width | Measure outer-to-outer across the tread with a tape measure on flat ground; record in millimeters | 180, 230, 250, 300, 320, 400, 450, 500+ depending on machine | Measuring on a slope; reading inches and writing mm; measuring on worn, rounded edges once | Take two or three readings along the length, average, and record the exact millimeters |
| Pitch | Measure center-to-center of two adjacent inner drive lugs; average 3–5 locations around the loop | 52.5, 72, 75, 86, 90, 96, 100, 101.6 (4"), 109, 115, 135 | Measuring only once; measuring edge-to-edge (not centers); including dirt thickness | Use a fine marker to dot lug centers before measuring; convert inches to mm accurately |
| Guide Type | Inspect the inner profile: internal guide runs between rollers; external guide sits outside a roller’s path | Internal or external; varies by OEM | Confusing guide type with tread pattern; ignoring sprocket tooth profile | Photograph inside profile and sprocket; match both guide type and tooth shape |
| Link Count | Count each inner lug around the loop; mark your start point with chalk | 72–100+ (varies widely) | Losing track; counting twice; mixing up damaged lugs | Mark every 10th lug, recount in the opposite direction, and confirm both totals match |
If the machine has heavily worn Rubber Tracks, pitch can “grow” slightly as the carcass stretches. That’s why averaging multiple measurements is key. When in doubt, match a new track’s size code to the sprocket tooth count and the OEM fit chart for your machine family.
Rubber Tracks share the same four core measurements across platforms, but the typical ranges and guide types can shift by machine. Use this side-by-side to set expectations before you order.
| Equipment Type | Common Width (mm) | Common Pitch (mm) | Typical Guide Type | Link Count Cue | Notes |
|---|---|---|---|---|---|
| Mini excavator (1–6 t) | 180–400 | 72–86–90–100–109 | Mostly internal guide | 72–96+ | Prioritize stable pitch match to the sprocket; look for even lug spacing wear |
| Compact track loader (CTL/MTL) | 320–450–500 | 86–100–101.6 | Varies by model; internal and external exist | 80–100+ | Carcass stiffness is higher; measure sag after install by the OEM rule |
| Skid steer (on Rubber Tracks conversion) | 250–320–400 | 72–86–100 | Depends on conversion kit | 72–90+ | Check kit sprocket profile; conversions can be picky about pitch |
| Agricultural machines (combine, tractor, harvesters) | 400–762+ (wider options) | 100–135+ | Often internal guide | 90–120+ | Measure multiple points; mud and straw can hide inner lugs and change readings |
| Utility crawler/other specialty | Varies | Varies | Model-specific | Varies | Always confirm with the model family’s chart; some use imperial pitch |
Your machine may fall outside these ranges, but the measurement method doesn’t change. For machines that work in fields or on dirt roads all season, clean the inside of the Rubber Tracks thoroughly before measuring pitch—packed mud can throw off center-to-center distances by several millimeters.
Most Rubber Tracks sizes are shown as Width × Pitch × Links. Here’s how that plays out and how to avoid the classic mistakes that lead to returns.
Width
Measured outer-to-outer. If your tape shows 12 inches on a worn track, convert to 305 mm and note that your average might come out to 300 mm. Always record in millimeters as the primary number.
Pitch
Pitch is the center-to-center distance of adjacent inner drive lugs. If your instrument is imperial, convert 4 inches to 101.6 mm, not 100 mm. That small difference matters at the sprocket.
Links
Count every lug. If you find 86 when you start at one location and 87 when you start elsewhere, one of the counts is off. Mark the start, count once, then have a second person confirm in the opposite direction.
Example code
300 × 52.5 × 86 or 320 × 86 × 90. The order is always width, pitch, then link count. If a catalog lists 300×52.5N×86, the “N” may denote guide or pattern type. Confirm with the seller.
Matching to sprocket tooth count
Sprocket condition and tooth count must match the track’s pitch. If your sprocket teeth are heavily pointed, replace them along with the Rubber Tracks for smooth engagement and longer life.
When your numbers differ from the catalog by a small amount, check whether your measurements were averaged and converted correctly. Small math errors, not manufacturing tolerances, are the most common cause of mismatch.

It feels like a simple sizing step, but those four measurements influence how the machine works every day.
Width affects ground pressure and traction
Wider Rubber Tracks lower ground pressure, which can help on soft soils and reduce rutting in fields. Narrower tracks offer livelier steering and lower rolling resistance on firm ground. Measure accurately, then decide whether you want to stay with the current width or adjust based on your jobsite conditions.
Pitch and sprocket match determines smoothness
When pitch matches the sprocket, the drive is quiet and efficient. If pitch is off—common when someone rounds 101.6 to 100—the drive lugs ride against the tooth tips. That accelerates wear and can cause derailing.
Guide type keeps you on track
Internal vs external guide differences matter because rollers and idlers are spaced for one type. Get this wrong and the track won’t run centered. You’ll hear squealing, see scuffing, and risk throwing the track.
Link count matters for tension and alignment
Too few or too many links throws off tensioning range. With too many links, you might hit the end of the adjuster before the track is tight enough. With too few links, you may not be able to install the track at all.
Getting Rubber Tracks measurements right is the best way to avoid returns, delays, and damage to the undercarriage.
Simple habits help your Rubber Tracks last longer and keep your measurements meaningful.
Average pitch across multiple points
Pitch growth happens with age. Averaging three to five points corrects for local stretch or damaged lugs.
Photograph the inside
A quick photo of the inner profile and sprocket lets you confirm guide type remotely with a parts supplier, reducing back-and-forth.
Recheck tension after a short run
After installing new Rubber Tracks, run the machine lightly, then recheck sag and adjust to the OEM’s spec. Fresh carcasses settle.
Note your soil and season
If you switch between rock, clay, and sand, record how often you adjust tension and how quickly the tread wears. This history helps you choose width and pattern next time.
Keep undercarriage clean
Dry mud hardens and alters your pitch reading and roller contact. A five-minute rinse pays back in lower wear.
These points are simple, but they cut the total cost per hour of Rubber Tracks by preventing premature failure, misfit, and derailments.
Even when the numbers look right, fit issues can pop up. Here’s how to diagnose and fix them fast.
Symptom: Track won’t climb onto the sprocket
Likely cause: Pitch mismatch or sprocket teeth worn sharp. Fix: Verify pitch again, confirm imperial-to-metric conversion, and inspect sprocket condition. Replace sprocket if teeth are hooked or sharp.
Symptom: Track keeps walking off undercarriage
Likely cause: Wrong guide type, bent idler, misaligned rollers, or incorrect tension. Fix: Confirm guide type, check idler alignment with a straightedge, and set tension to the OEM spec after a short run-in.
Symptom: Can’t reach proper tension
Likely cause: Incorrect link count or seized adjuster. Fix: Count links again; service or replace the adjuster; inspect seals.
Symptom: Excessive vibration or noise
Likely cause: Pitch error, roller flat spots, or sprocket tooth wear. Fix: Re-measure pitch; spin rollers by hand to feel for flats; replace noisy parts during the track change.
Symptom: Uneven wear on one side
Likely cause: Misaligned idler or bent frame component. Fix: Align components and confirm the track runs centered at normal tension.
If you hit one of these snags, recheck your four measurements, then inspect each undercarriage component in turn. A bad idler or roller can ruin new Rubber Tracks quickly if left uncorrected.
While every machine is different, a few useful relationships show up in the field across Rubber Tracks applications.
Ground pressure scales down as width scales up
Moving from 300 mm to 400 mm on suitable platforms spreads load and reduces rutting on soft soils. It also stabilizes the machine on slopes. The trade-off is higher rolling resistance and sometimes a tighter turning radius.
Proper pitch match reduces shock loads
When pitch matches the sprocket, drive lugs seat fully at each tooth. Shock loads drop, which preserves cords in the track carcass and protects bearings in rollers and idlers.
Tension is a wear lever
Too tight raises carcass stress and accelerates wear. Too loose causes ratcheting and derailments. Follow the OEM sag spec and recheck after the first hours on new Rubber Tracks to reset for initial stretch.
Cleanliness preserves dimensions
Mud and gravel caked between lugs can distort pitch readings by a few millimeters—enough to cause a wrong order. Clean tracks before measuring to keep your numbers honest.
Keep these relationships in mind while you measure and when you decide whether to stick with your current width or change for your terrain.
Sizing Rubber Tracks is step one. Step two is making sure the undercarriage is ready to support them. When Rubber Tracks fail early, the root cause is often a worn or misaligned metal component. Inspect and upgrade these parts while you’re ordering, especially on machines that work daily.
Sprockets
Confirm tooth shape. Hooked or pointed teeth chew into drive lugs and can make a correct pitch feel wrong. Replace sprockets with the tracks.
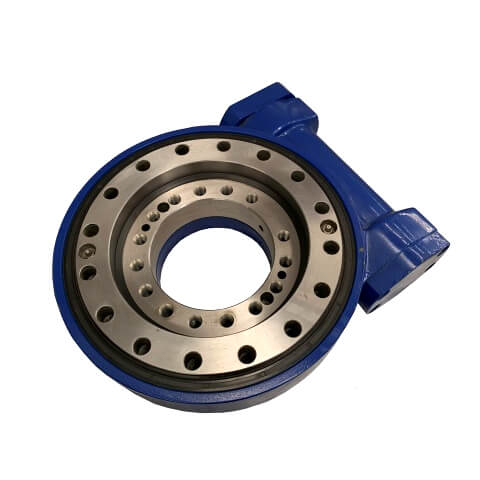
Idlers
Check for smooth rotation and correct alignment. Even a slight offset can push the track to one side, causing scuff and de-tracking.
Top and bottom rollers
Spin each; listen and feel for flats. If a roller binds, it will scuff the track and build heat.
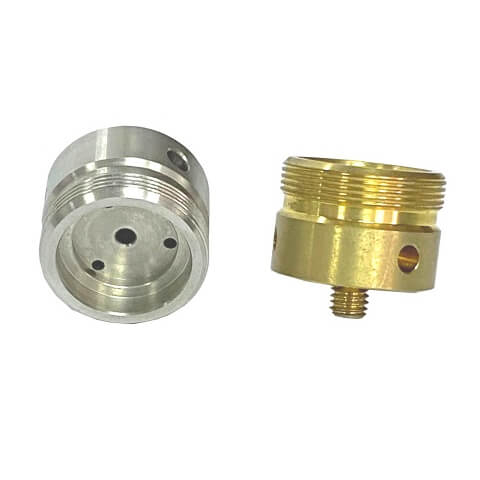
Tensioner (adjuster assembly)
Inspect seals and verify the rod moves smoothly. A seized adjuster keeps tension off and lets the track wander.
Fasteners and seals
Use the correct bolts and washers at rated torques. Old fasteners lose clamping force and let components shift under load.
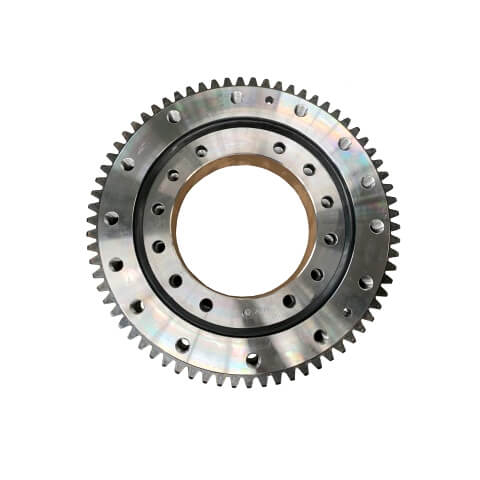
You can source these parts and related categories from one consolidated product hub. The most relevant categories to undercarriage reliability include Agricultural Machinery Parts, Metal Casting, Metal CNC Machining, Bearing & Gear, Fastener and Seal, and Forging & Fabrication.
If you run combines, tracked tractors, or harvesters, Rubber Tracks keep you moving in soft fields and through seasonal mud. Measuring Rubber Tracks correctly is only half the story; the undercarriage that supports them needs to be right as well. That’s where Agricultural Machinery Parts come into play.
Housings, brackets, and guards
Cast and machined housings hold alignment across seasons of vibration and load cycles. Good bracket geometry helps keep Rubber Tracks centered even as bushings wear.
Idler and roller bodies
Cast or forged bodies with tight Metal CNC Machining on bores and sealing faces keep bearings aligned and grease inside. That reduces heat and extends track life.
Drive components
Gears and hubs made with consistent tooth profiles and balanced mass reduce resonance that can shake tracks off in rough fields.
Fasteners and seals
Right-size bolts, bushings, and seals keep everything tight and clean. It’s the cheap, fast way to stop recurring leaks and misalignment.
Bringing these categories together under one supplier means your Rubber Tracks measurements and undercarriage parts are treated as a matched system.
If you’re upgrading more than Rubber Tracks, here’s how to make sourcing simple and reliable.
Share your measurements and machine family
Provide width, pitch, guide type, link count, and the model family. If you have photos of the inner lugs and sprocket, include those.
Include drawings and 3D files for metal parts
For idlers, rollers, brackets, and adjusters, include bore sizes, tolerances, sealing faces, and thread specs.
Specify materials and finishes
For example, cast iron grade for idlers, aluminum alloy for weight-sensitive housings, and galvanizing or other coatings for corrosion resistance.
Add volumes and delivery cadence
State annual usage and preferred delivery rhythm—especially helpful for fleets or seasonal agricultural work.
Define test and cleanliness standards
Oil and grease-carrying parts often need particle cleanliness and pressure tests. Spelling this out prevents rework.
Ask for integrated processes
Request casting plus machining on critical faces and bores so sealing and alignment are done end-to-end. This is where Metal Casting followed by Metal CNC Machining shines.
Measuring Rubber Tracks is low-risk, but your machine is heavy and can move unexpectedly if not secured.
Park on level, solid ground and set the brake.
Lower attachments to the ground and relieve hydraulic pressure.
Keep hands clear of pinch points between Rubber Tracks and rollers.
Don’t crawl under an unsupported machine. Use rated stands if needed.
Wear gloves and eye protection while scraping or washing tracks.
These basics keep a simple measurement job from turning into a bad day.
Q1: What are the four measurements I need for Rubber Tracks?
A1: You need width (outer-to-outer), pitch (center-to-center of adjacent inner drive lugs), guide type (internal vs external), and total link count. Record them in millimeters and average your pitch across several points.
Q2: How do I measure rubber track pitch accurately?
A2: Clean the inner lugs, mark the centers of two adjacent lugs, measure center-to-center, and repeat that process three to five times around the loop. Average the numbers to minimize wear-related error. If you use inches, convert to millimeters precisely (for example, 4 inches is 101.6 mm).
Q3: What does width × pitch × links mean on a size code?
A3: It’s the standard way to show Rubber Tracks size. For example, 320 × 86 × 90 means a 320 mm width, 86 mm pitch, and 90 total lugs/links. If the code includes letters, they often mark pattern or guide type—confirm before ordering.
Q4: Why won’t my new Rubber Tracks fit even though the width matches?
A4: Width alone doesn’t guarantee fit. Pitch, guide type, and link count must also match. Also inspect sprocket condition—hooked or sharp teeth can keep a good track from seating correctly.
Q5: Do mini excavators and compact track loaders use the same Rubber Tracks sizes?
A5: They can share widths and pitches, but not always. CTLs may use different guide types and stiffer carcasses. Always confirm the full size code—width, pitch, and link count—plus guide type before buying.
Q6: How tight should Rubber Tracks be after installation?
A6: Follow the OEM sag specification for your machine. As a general rule, you want a small, defined amount of sag at midspan. Recheck tension after a short run-in because new tracks settle.
Q7: Which undercarriage parts should I check or upgrade along with Rubber Tracks?
A7: Inspect sprockets, idlers, top and bottom rollers, and the tensioner assembly. If you’re in farming or construction, consider upgrading critical metal components through categories like Agricultural Machinery Parts, Metal Casting, and Metal CNC Machining to improve alignment and sealing.
To size Rubber Tracks correctly, stick to the four essentials: width, pitch, guide type, and link count. Park on level ground, clean the track, measure in millimeters at multiple points, average your pitch, count links carefully, and match the code (Width × Pitch × Links) to your machine’s sprocket and undercarriage. Doing this once saves weeks of delay, prevents returns, and protects your rollers, idlers, and bearings from the stress caused by misfit tracks.
If you want to reduce wear and avoid repeat breakdowns, look beyond Rubber Tracks to the undercarriage as a whole. Reliable sprockets, idlers, rollers, and adjusters—built with consistent casting and machining—keep your new tracks running straight and cool. That’s where a single-source catalog makes life easier. Explore Agricultural Machinery Parts, Metal Casting, Metal CNC Machining, Bearing & Gear, Fastener and Seal, and more through one hub. Share your measurements, drawings, materials, volumes, tolerances, and test standards to get a fast, accurate quote and a matched set of parts.
With the right measurements and a reliable supplier, you’ll get Rubber Tracks that install smoothly, run quietly, and last longer—whether you’re trenching with a mini excavator, grading with a compact track loader, or harvesting in challenging field conditions.