 English

Views: 0 Author: Site Editor Publish Time: 25-08-2025 Origin: Site


You make an extendable robot arm by planning its shape. You pick good materials for the arm. You build the extension part and put all pieces together. You test the finished robot arm to see if it works. Choosing the right parts helps the arm stay steady and reach far. Many beginners have trouble with making the robot arm exact. They also find it hard to set up and keep the arm stable. You can solve these problems by trying new designs. You learn from each try. The steps are easy to follow, even if you are new to robotics.
First, plan how your robot arm will look. Decide what jobs it will do. Think about how far it needs to reach. Make sure the design fits your project needs.
Pick good materials for your robot arm. Metals are strong and tough. Plastics and composites are light and bend easily.
Use the right tools to put it together. You need drills, 3D printers, and wrenches. These tools help you build a strong robot arm.
Test your robot arm often. Watch how it moves and check its strength. Make sure it is steady and works well for a long time.
Think about using modular designs. These let you upgrade or fix parts easily. Your robot arm can change for new jobs in the future.
When you begin your robot arm project, you must choose good materials. Every material is different and has things it is good at and things it is not. The table below shows how metals, plastics, and composites are used for robot arms:
Material | Strength | Rigidity | Toughness | Weight | Fabrication Difficulty |
|---|---|---|---|---|---|
Metals | High | High | High | Heavy | Moderate to High |
Plastics | Low | Low | Moderate | Light | Low |
Composites | Moderate | Moderate | High | Light | Moderate |
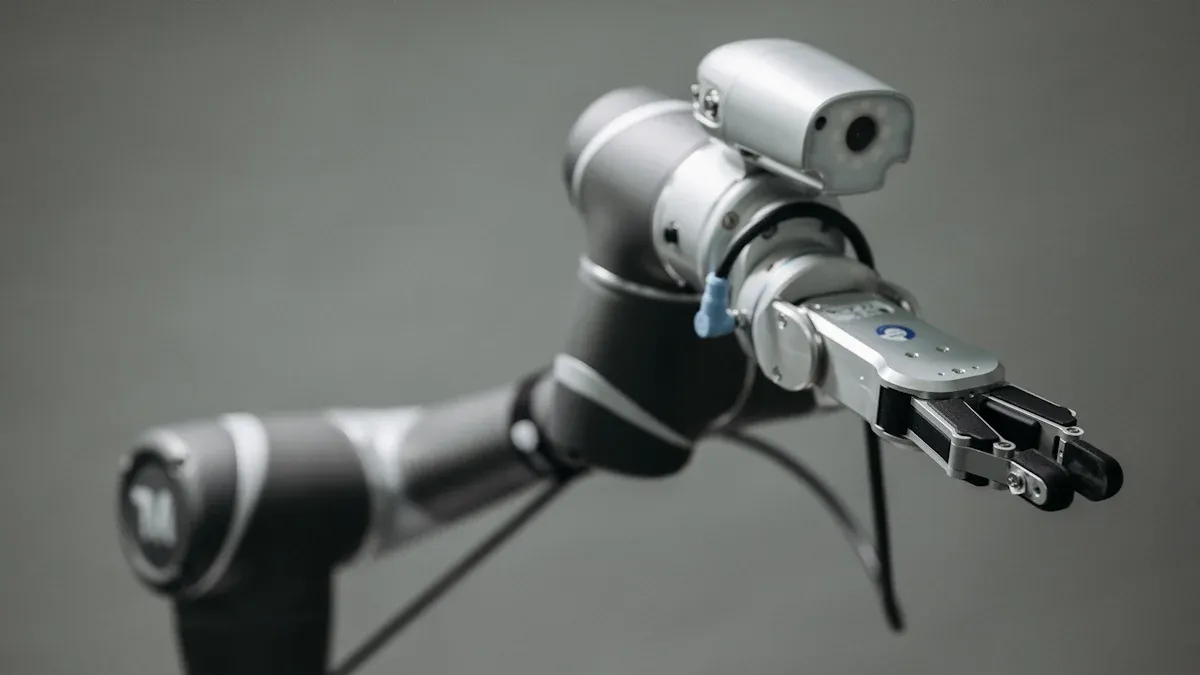
People often pick metals like steel or aluminum for the main frame. Metals make the robot arm strong and keep it stiff when moving. If you want metal parts that are high quality, JOC Machinery is a good choice. They use investment casting, steel forging, aluminum casting, and CNC machining. These ways help make strong joints, links, and gearboxes for your robot arm. Metal parts last a long time and can hold more weight. This is important if your robot arm does heavy work.
Plastics and composites are best for arms that are light or do not lift much. You can use 3D printing to make special shapes fast. Composites like carbon fiber are strong but not heavy. These materials help your robot arm move quickly and use less power. For some pieces, like covers or sensor holders, plastics work well.
You need the right tools to build your robot arm. Here are some important ones:
Drills and screwdrivers help you put parts together
CNC machines shape metal pieces
3D printers make plastic or composite parts
Wrenches and pliers tighten joints
Soldering iron connects wires for actuators and sensors
Picking good tools helps you make a strong robot arm. The right tools make building easier and help your robot arm work better.

You start your extendable robot arm by planning its structure. This step helps you decide what the arm will do and how far it needs to reach. Follow these steps to plan your design:
Choose your robot arm and end-of-arm-tooling. Think about the tasks you want the arm to perform. Check the maximum payload, reach, speed, and repeatability you need. Make sure you select a design that fits your project goals.
Design the robot cell equipment. Use 3D modeling tools to visualize your setup. Plan for parts like conveyors, jigs, or chutes if your arm will work with other machines.
Sketch the arm’s main sections. Draw the base, joints, and extension mechanism. Mark where you want the arm to extend and retract.
Decide on the type of extendable mechanism. You can pick from scissor lifts, telescoping tubes, or linear slides. Each type changes how the arm moves and how much space it needs.
Think about safety. Plan for sensors, speed limits, and emergency stops. Add barriers or guards if people will work near the robot arm.
Tip: Modular designs make your robot arm easier to upgrade and repair. You can swap out parts or add new features without starting over.
You have several choices for the extendable part of your robot arm. Each mechanism has its own strengths:
Scissor Mechanism: This design uses crossed bars that open and close like scissors. It gives you a long reach and folds up small when not in use.
Telescoping Mechanism: This type uses tubes that slide inside each other. You pull out the tubes to extend the arm and push them back to retract. Telescoping arms save space and look neat.
Linear Slide Mechanism: This design uses rails and sliders. The arm moves in and out along the rails. Linear slides give you smooth, straight movement.
You should pick the mechanism that matches your reach and load needs. If you want to know how to build a strong and reliable extendable section, use sturdy materials and test the movement often.
Note: Modular components help you change the arm’s length or add new tools later. This makes your extendable robot arm ready for new tasks.
Now you can put your robot arm together. Follow these steps for a smooth assembly:
Lay out all your parts and tools. Check that you have everything you need.
Start with the base. Attach it to a stable surface.
Build the main arm sections. Connect the joints and make sure they move freely.
Install the extendable mechanism. Attach it to the arm and test its movement.
Add the end-of-arm-tooling. This could be a gripper, suction cup, or other tool.
Secure all bolts and screws. Tighten joints but leave enough play for smooth movement.
Safety Reminder: Add physical barriers or guards around the robot arm if people will work nearby. Install emergency stop buttons within easy reach.
You need to connect the electronics to make your robot arm move. Here’s how you can wire and control your arm:
Attach motors or actuators to each joint and the extendable section.
Run wires neatly along the arm. Use cable ties or channels to keep them safe.
Connect sensors for position, force, or proximity. These sensors help the arm avoid obstacles and work safely.
Set up the control system. You can use a microcontroller or a computer. Program the movements and test each function.
Add safety features. Use emergency stop switches and interlocks. Make sure the arm stops if someone gets too close.
Tip: Adaptive safety systems adjust the robot’s speed and force if a person comes near. This keeps your workspace safe.
You can now test your extendable robot arm. Try different movements and check that the extension works smoothly. If you want to upgrade or change the arm later, modular parts make this easy.
You want your extendable robot arm to stay steady. Good materials and smart design help with this. Fiber-reinforced polymer composites are strong and light. They also resist impacts well. Aluminum and titanium are tough but not heavy. Steel is very strong for big jobs, but it is heavy.
Here is a table that shows how materials affect stability:
Material Type | Advantages | Disadvantages |
|---|---|---|
Rigid Materials | Hold heavy loads, control is precise | Heavy, not easy to change |
Soft Materials | Bend easily, good for gentle work | Not strong, can't lift heavy things |
Tensegrity Structures | Balance forces, absorb shocks | Hard to make and build |
You can make the arm more stable by adding supports. Using bearings made with care helps too. Check your space and how strong the arm needs to be before you start. If the arm shakes, look for loose joints or parts. Fix these by tightening bolts and using better bearings.
Tip: Fiber-reinforced composites and strong supports keep your robot arm stiff and accurate.
Smooth movement helps your robot arm work well and last longer. Electric actuators move gently and are very exact. Hydraulic actuators lift heavy things. Pneumatic actuators move fast with light objects. Pick the actuator that fits your job.
Jamming or shaking often happens from loose shafts or bad alignment. You can stop these problems by using good bearings. Avoid designs that shake at certain speeds. If your arm jams, check the software or setup. Fixing problems early keeps your arm safe and working.
The environment matters too. Heat or humidity can change how grease works in moving parts. Keep your robot arm clean and check for wear often.
Note: Checking your robot arm often and using good materials helps you avoid movement problems and keeps your project working well.
Your robot arm might shake or move too much when you use it. This can make your project less accurate. It can even break parts. You can try these steps to fix the problem:
Check if your power supply is strong enough. Try using a 6V power source instead of 5V. Make sure it gives at least 3A, or 4A or more at 5V.
Tighten every bolt and joint. Loose parts can make the arm wobble.
Put damping materials on the arm to soak up shakes.
Keep the robot arm away from things that vibrate, like other machines.
Use a good PID control system to help the arm move better and shake less.
Plan the path for your robot arm carefully. Smooth paths help stop extra shaking.
Do regular checks and fix or change any worn parts.
Tip: Checking your robot arm often and planning well keeps it steady and safe.
Sometimes the part that extends does not move well or stops. You can fix this by looking at some important things:
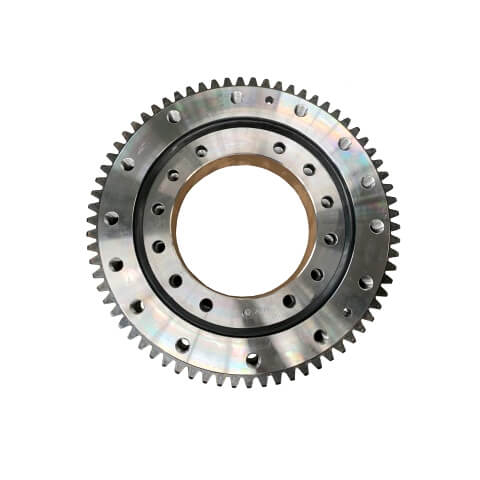
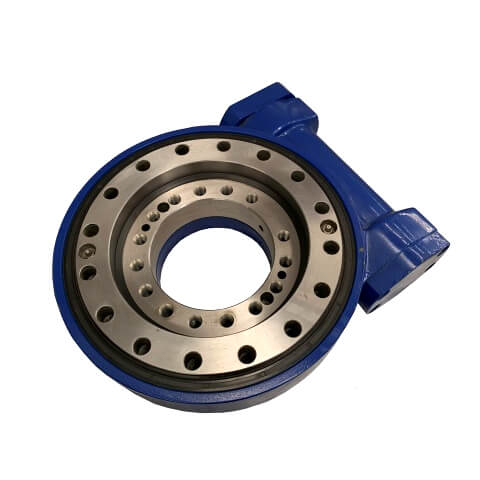
Bearings are very important for the robot arm to extend well. Good bearings help the arm last longer and work more. Lubrication is also needed. If joints do not have enough grease, they can get stuck and stop moving. This happens a lot in busy places. Use the right grease and check it often. Parts can wear out if you use the arm a lot. Change old mechanical or electrical parts to keep your project working.
Note: Good bearings and the right grease help stop extension problems and keep your robot arm moving well.
Control problems can make your robot arm move in odd ways. You might see jerky moves, errors, or loud joints. Use this table to help you fix problems:
Step | Description |
|---|---|
1 | Use tools to check the system. |
2 | Find the problem and take apart the broken joint or part. |
3 | Change broken parts for better ones. |
4 | Set up the system again and test all moves. |
5 | Make sure everything works and write down what you find. |
You need to know about both software and hardware. Built-in tools help you find problems fast. If you see the arm miss spots or motors get too hot, check the control system and parts.
Tip: Careful checks and setting up your robot arm often help you stop control problems when building an extendable robot arm.
You need to test your extendable robotic arm to make sure it works well and stays reliable. Start by checking how the arm moves and how strong it is. Use simple steps to measure performance. Here is a table that shows common ways to test your robot arm:
Assessment Type | Description |
|---|---|
Active Range of Motion (aROM) | Measures how far the arm can move by itself. |
Passive Range of Motion (pROM) | Checks how far the arm moves when you push it gently. |
Isometric Strength | Tests how much force the arm can hold without moving. |
Resistance to Passive Movement | Looks at how hard it is to move the arm when it is turned off. |
Quality of Movement | Checks if the arm moves smoothly and efficiently. |
Workspace Evaluation | Measures the area where the arm can reach and work. |
Test–Retest Reliability | Tests the arm twice to see if it gives the same results each time. |
You can also use these metrics to see how well your robot arm performs:
Acquisition Time (AT): Time it takes for the arm to reach a target.
Validation Time (VT): Time the arm stays inside the target zone.
Path Shortness (PS): How close the arm’s path is to the shortest possible route.
Maximum Overshoot Ratio (MOR): How much the arm goes past the target.
Tip: Write down your results each time you test. This helps you spot problems and track improvements.
You can make your robot arm better by adding new features and using stronger materials. Here is a table with some upgrades you can try:
Upgrade Type | Description |
|---|---|
Durability | Use parts that last longer and can handle more work. |
Material selection | Try carbon fiber for lighter joints or steel for extra strength. |
Speed tuning | Adjust speed to avoid overshooting and tool damage. |
Modular construction | Build with parts you can swap out easily for repairs or upgrades. |
Predictive diagnostics | Add sensors to watch for problems before they happen. |
Invest in high-quality end effectors to improve what your robot arm can do.
Use modular tooling so you can change tools for different jobs.
Keep up with regular maintenance and checkups to avoid breakdowns.
You can also add automation and advanced control systems. These upgrades help your robot arm work faster and more accurately. You get better performance and can connect your robot to digital tools for easier control. Modern engineering trends include articulated 6-axis, 7-axis, and even 8-axis robot arms. These designs give you more flexibility and reach. Soft robotics let your arm change shape and size, making it safer and more useful for many tasks.
Note: Regular upgrades and testing keep your robot arm working at its best. Try new ideas and watch for new technology to stay ahead.
You can make an extendable robotic arm by following easy steps. First, plan how your arm will look and work. Next, pick strong materials for building. Then, put all the parts together with care. Last, test your robot arm to see if it works well. Testing and fixing your design helps your robot arm work better and last longer. The table below shows how feedback and testing help:
Description | Contribution |
|---|---|
Real-time feedback | Makes the robot arm more reliable and lets you fix problems fast |
Continuous integration | Lets you test your robot arm in different ways |
To avoid mistakes, check your motor math and use counterweights. Always make sure your work is high quality. Building robot arms helps you learn and solve problems. It also makes you feel more confident. Keep trying new ideas and make your robot arm better each time.
You can build a simple extendable robotic arm in a weekend. If you want more features or a stronger design, you may need a week or more. Planning and testing help you finish faster.
Yes, you can build a wooden robot arm for light tasks or learning projects. Wood is easy to cut and shape. It works well for beginners who want to understand basic mechanics.
You need basic skills in measuring, cutting, and assembling parts. Knowing how to use simple tools helps. If you learn about motors and sensors, you can make your robot arm move and work better.
Testing helps you find problems early. You can fix mistakes before they cause bigger issues. Testing also teaches you more about science and engineering education as you see how your design works.
You can add supports or use stronger materials. Tighten all bolts and check for loose parts. Using good bearings and planning your design helps your robot arm stay steady during use.