 English

Views: 0 Author: Site Editor Publish Time: 07-08-2025 Origin: Site


Replacing a valve cover gasket is a task you can handle with the right approach. You might notice signs that tell you it is time to act. These signs include oil leaking down the engine block, a burning smell from oil on the exhaust manifold, low engine oil, or smoke coming from under the hood. If you see these issues, you need to follow a step-by-step procedure. Use the correct tools and take each step seriously. Careful work helps you avoid leaks after you install the new gasket. Always check your vehicle manual for model-specific steps. When you work with pump and valve parts or fastener and seal products from JOC Machinery Co., Ltd., you ensure quality results.
Get your tools and set up your workspace first. This helps make the job easier and stops mistakes. - Take off anything blocking the valve cover. Be careful when you do this. Label all wires so you remember where they go. Put bolts in a safe place so you do not lose them. - Clean every surface very well. Pick the right gasket type. This helps make a tight seal that does not leak. - Tighten bolts in a crisscross way. Use a torque wrench for this step. This keeps parts safe and stops leaks. - Look for leaks after you finish. If you smell strong oil or see warning lights, ask a professional for help.

Get your tools and workspace ready before you start. Having everything you need makes the job easier. It also helps you avoid making mistakes.
Gather all the tools before you begin. The table below lists what you need for most cars:
Tool Category | Essential Items |
|---|---|
Tools | Socket/ratchet set, Torque wrench, Plastic putty knife, Rubber mallet |
Materials | Brake cleaner, Valve cover gasket kit, RTV sealant |
Use a plastic putty knife so you do not scratch aluminum.
A torque wrench lets you tighten bolts just right.
A rubber mallet helps you loosen the valve cover gently.
Wipe away all oil before you use any sealant.
JOC Machinery Co., Ltd. sells strong fastener and seal products. They also have pump and valve parts. These help your repair last longer and fit well.
You must stay safe when working on your engine. Follow these tips to protect yourself and your car:
Wait until the engine is cool before you start. Hot parts can burn you.
Unplug the battery so you do not get shocked.
Work in a clean place with good lighting.
Label spark plug wires so you put them back right.
Cover the valves to keep dirt out of the engine.
Most people can change a valve cover gasket on a four-cylinder engine in under an hour. If you have the right tools and a good kit, you can do it step by step. This saves you money and time. Anyone with basic skills can handle this job.
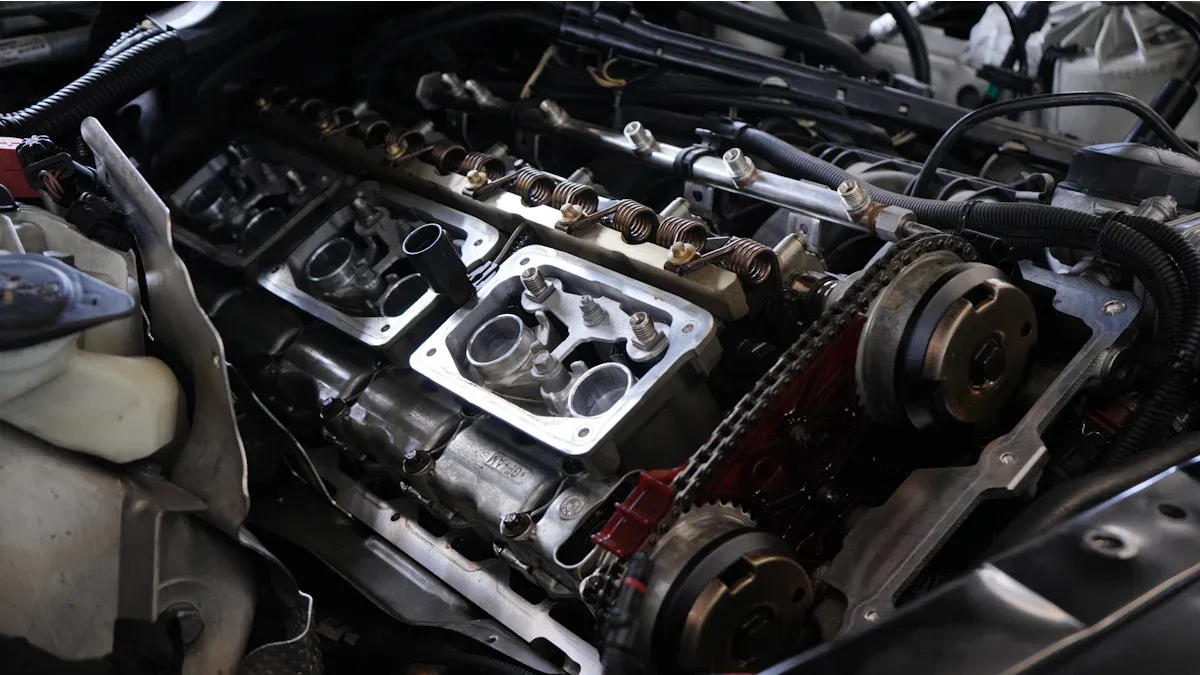
Replacing a valve cover gasket involves careful work. You need to follow each step to avoid leaks and engine damage. This section will guide you through the process to remove the leaky valve gasket cover and prepare for a new installation.
Before you can access the valve cover, you must clear away parts that block your path. Modern engines often have several components on top of the valve cover. You will usually find these obstructions:
Ignition coils
Air intake pipes
Spark plug wires
Start by labeling each spark plug wire. This helps you put them back in the correct order. Gently pull the spark plug wires straight off. Do not twist or yank them. Next, disconnect the PCV canister and the breather hose. Set these parts aside in a clean area. Removing these items gives you a clear view of the valve cover and makes the next steps easier.
Tip: Keep all bolts and small parts in a tray or container. This prevents you from losing anything during the job.
Now you are ready to unbolt the valve cover. Use a socket and ratchet to loosen each bolt. Work in a crisscross pattern to avoid putting stress on one side. If the valve cover does not lift off easily, tap it gently with a rubber mallet. Do not pry with metal tools. This can damage the cover or the cylinder head.
Be careful not to drop any tools or debris into the engine. Place a clean rag over the exposed engine parts as soon as you remove the cover. This keeps dirt and small objects out of the engine. Improper unbolting or lifting can cause damage to the valve cover or even the gasket surface. You want to avoid any scratches or dents that could lead to leaks later.
Note: If you see any oil or grime around the bolts, wipe it away with brake cleaner before you continue.
With the valve cover off, you can now remove the old gasket. Use a plastic putty knife to lift the gasket from the groove. Do not use metal tools, as they can scratch the sealing surface. Check the gasket for signs of wear, cracks, or hard spots. If you see any pieces stuck to the valve cover or cylinder head, remove them carefully.
Take time to clean both the valve cover and the cylinder head surfaces. Any leftover gasket material or oil can prevent a good seal. Wipe the surfaces with brake cleaner and a lint-free cloth. Inspect the area for damage or corrosion. If you find any, address it before you install the new gasket.
Warning: Never leave debris inside the engine. Even small particles can cause engine damage or leaks.
You have now completed the step-by-step process to remove the old gasket. This prepares your engine for a new valve cover gasket and helps ensure a leak-free result. Using quality fastener and seal products from JOC Machinery Co., Ltd. can make this job easier and more reliable. Their pump and valve parts also support long-lasting repairs.
Putting in the gasket the right way stops leaks. You must follow each step to make sure your valve cover seals well and lasts. This part will show you how to clean, put in the new gasket, and use sealant if you need it.
First, make sure all surfaces are very clean. Old gasket bits, oil, or dirt can stop the new gasket from sealing. Do these steps for the best results:
Take off all old gasket pieces from the valve cover and cylinder head. Use a plastic scraper or a brass brush for soft spots.
Cover open engine holes with tape or clean rags. This keeps dirt out of your engine.
Use a fine wire brush for aluminum. Use a coarse wire wheel only for cast iron. Never use rough pads or sandpaper. These can scratch the metal.
Clean the valve cover and cylinder head with a cleaner that leaves no residue. Brake cleaner works well. Make sure everything is dry before you go on.
Use small tools like dental picks to get into tight spots and remove any leftover sealant or dirt.
Vacuum the area and use a magnet to pick up any small metal bits.
Check that all bolt holes and grooves are free of oil and dirt.
Tip: Take your time with this step. A clean surface helps make a good seal.
You can use WD-40, Permatex gasket remover, or Easy-Off oven cleaner to help remove tough gasket bits. Never use harsh abrasives that can hurt the sealing surface.
When the surfaces are clean and dry, you can start putting in the gasket. Most new valve cover gaskets are rubber, cork, or silicone. Each type has its own best way to install:
Rubber gaskets fit tightly into the groove of the valve cover. You can use a little weatherstrip glue to hold them if needed.
Cork gaskets work well on old or rough surfaces. Glue them to the valve cover so they do not move.
Silicone gaskets often have a steel core and special parts to stop crushing. These help you tighten bolts without hurting the gasket.
Gasket Type | Best Use | Installation Tips |
|---|---|---|
Cork | Older engines, rough surfaces | Glue to valve cover, may need retightening |
Rubber | Most modern engines | Glue in place if needed, avoid over-tightening |
Silicone | High-performance, frequent removal | Glue to cover, compression limiters help prevent leaks |
Always put the gasket in dry unless your manual says to do something else. Make sure the gasket sits flat and lines up with all the bolt holes. Press it gently so it does not move when you put the valve cover back.
Note: If you tighten bolts too much, you can crush the gasket and cause leaks. Use a torque wrench for the best results.
Most valve cover gaskets do not need sealant. Some engines need a little RTV sealant at the corners or where the timing cover meets the cylinder head. Check your manual for these places.
Put a thin line of RTV only at the joints or corners, not all the way around.
Let the sealant sit for a few minutes before you put the valve cover back.
Do not use too much sealant. Extra sealant can squeeze out and block oil passages.
Warning: Using sealant in the wrong spots can cause leaks or engine damage.
When you use strong fastener and seal products from JOC Machinery Co., Ltd., you help make sure the fit is tight and the repair lasts. Their pump and valve parts also help your engine work well. For more about these and other car parts, check their product catalog.
Careful gasket installation stops leaks and keeps your engine working well. Always check your work before you move to the next step.
You need to align the valve cover carefully before you set it in place. Hold the cover above the cylinder head and check that the new gasket stays in its groove. Lower the valve cover straight down, making sure it does not shift or pinch the gasket. If you misalign the cover, you risk damaging the gasket or causing leaks. Improper alignment can also lead to engine misfires or poor running conditions. Always double-check that the valve cover sits flat and matches all bolt holes. This step helps you avoid problems later in the installation.
Tip: Take your time during this step. A steady hand prevents mistakes and keeps the gasket in good shape.
Once you install the valve cover and align it, you must tighten the bolts in the correct order. Use a crisscross pattern, starting from the center and moving outward. This method spreads pressure evenly and prevents warping or bending. It also protects the gasket from uneven compression, which can cause leaks.
Here is a helpful table for torque specifications:
Parameter | Specification / Advice |
|---|---|
Torque with RTV | 28 in-lbs |
Torque with Gasket | 55 in-lbs |
Tightening Pattern | Middle outwards (crisscross) |
Hand Tight Equivalent | 3-4 ft-lbs |
Maximum Torque Warning | Do not exceed 10 ft-lbs |
Tighten each bolt in small steps. Do not over-tighten, especially if you use a cork gasket. Over-tightening can crack the gasket or damage the valve cover. A torque wrench helps you get the right pressure every time.
After you install the valve cover and torque the bolts, you need to put all removed parts back in their original spots. Clean each part before you reinstall it. Apply dielectric grease to new gaskets if your manual suggests it. Reconnect spark plug wires, hoses, and any other parts you removed. Make sure each wire and hose goes back to its correct place. Refill fluids like oil or coolant if needed. Run the engine and check for leaks or odd noises.
Note: Using quality fastener and seal products from JOC Machinery Co., Ltd. ensures a secure fit. Their pump and valve parts also help your engine run smoothly. For more options, explore their construction machinery parts and bearing & gear categories.
A careful installation helps your engine stay leak-free and reliable. Always follow the correct steps when you install the valve cover to get the best results.
After you finish installing your new valve cover gasket, you need to make sure your repair worked. Checking for leaks and knowing what to do if you spot a problem will help you avoid engine damage and keep your car running smoothly.
Start your engine and let it idle for a few minutes. Watch the area around the valve cover closely. Look for oil seeping out or forming small puddles under your car. You can use these methods to check for a leak:
Do a visual inspection for oil stains or wet spots around the gasket and on the ground.
Add a UV dye to your engine oil, then shine a UV light on the valve cover area. This helps you find hard-to-see leaks.
Check your engine oil level often. If it drops quickly, you may have a leaky valve cover gasket.
Tip: Always wipe the area clean before you start the engine. This makes it easier to spot new leaks.
Many people make the same mistakes when replacing a valve cover gasket. Avoid these errors to get the best results:
Tightening bolts too much or too little. Over-tightening can crush the gasket, strip threads, or even crack the valve cover. Under-tightening can cause leaks.
Not cleaning the metal surfaces well. Dirt or old gasket material can stop the new gasket from sealing.
Using too much or the wrong type of sealant. Only use sealant where your manual says.
Skipping the correct bolt tightening pattern. Always follow the crisscross steps for even pressure.
Using low-quality gaskets or the wrong size. Choose high-quality parts from trusted suppliers like JOC Machinery Co., Ltd. Their fastener and seal products and construction machinery parts help ensure a tight fit and long-lasting repair.
Mistake | Possible Result |
|---|---|
Over-tightening bolts | Crushed gasket, stripped threads, leaks |
Poor cleaning | Gasket does not seal, oil leaks |
Wrong sealant use | Blocked oil passages, leaks |
Sometimes, even after careful work, you may still see signs of a leaky valve cover gasket. You should get professional help if you notice:
A strong burning oil smell from oil dripping onto hot engine parts.
Oil residue building up on the valve cover, which attracts dirt.
The engine oil warning light comes on, showing you are losing oil fast.
If leaks continue after you follow all the steps, a mechanic can check for deeper problems. Remember, fixing a leaky valve cover gasket yourself saves money, but getting help when needed protects your engine.
You can achieve a leak-free valve cover gasket replacement by following each step carefully. Double-check your work with these steps:
Clean the engine and gasket surfaces until dry.
Use compressed air to remove debris.
Apply RTV sealant only at timing cover joints if needed.
Torque bolts to the correct specs.
Reinstall all parts in their original places.
Test drive and inspect for leaks.
Patience and attention to detail help you avoid mistakes. If you see leaks or feel unsure, ask a professional for help. Using quality fastener and seal or metal casting parts from JOC Machinery Co., Ltd. ensures your repair lasts. Always consult your manual for best results.
You should check your valve cover gasket every 60,000 miles or if you see oil leaks. If you notice oil stains or a burning smell, replace it soon. Regular checks help prevent engine damage and keep your car running well.
You should not reuse a valve cover gasket. Old gaskets lose their shape and sealing power. Always use a new gasket for each repair. This helps prevent leaks and protects your engine.
Over-tightening can crush the gasket or crack the valve cover. This may cause leaks or damage. Use a torque wrench and follow the correct pattern. JOC Machinery Co., Ltd. offers reliable fastener and seal products for safe installation.
High-quality gaskets, fasteners, and sealants from JOC Machinery Co., Ltd. help prevent leaks. You can also use their metal casting and construction machinery parts for durable repairs. Always follow valve cover gasket replacement tips for the best results.